It’s seed starting time! AKA the busiest, most stressful—and still somehow the most wonderful— time of the year.
We understand your excitement, we really do—but before you run off to the greenhouse with those seeds you paid good money for, you might want to double-check this list. Or at the very least, skim over it.
How to Avoid 10 Common Seed Starting Mistakes
Keep reading for ten common mistakes growers make when starting their seeds, and what we recommend you do instead. Follow these tips and a thriving summer garden is right around the corner!
1. Starting seeds too early or too late
The most common and easily preventable seed-starting mistake is bad timing. Beginning growers especially, but even more seasoned green thumbs, can succumb to the tantalizing warm sunny days in early spring and start seeds too soon.
Do this instead:
Even though the USDA just updated its plant hardiness zone map – placing most of the country in a warmer hardiness zone—it’s still best to go by the average last frost date in your area when planning when to sow seeds.
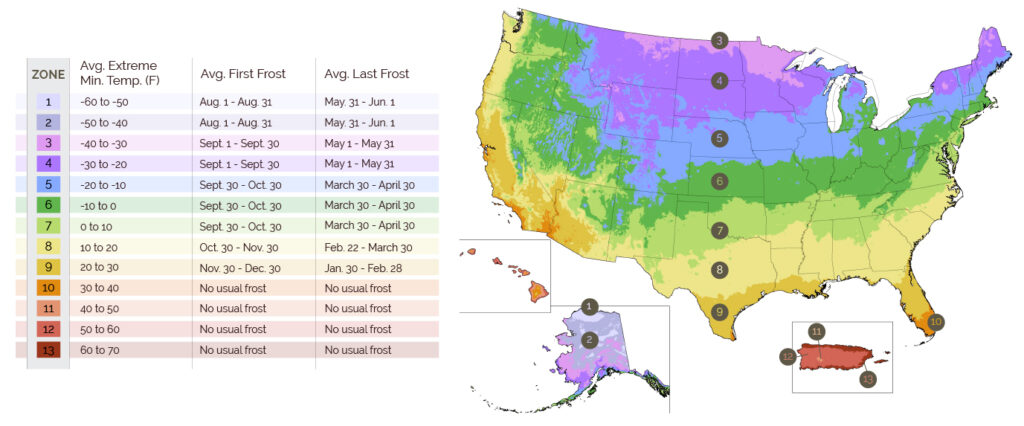
Type your zip code into the search bar on this page and our frost dates chart will pull up the average first and last frost dates in your area. Check the seed packet for the number of weeks to transplant (or days to harvest, also called ‘Days to Maturity’) and count backward the recommended number of weeks to get an approximate date to start seeds.
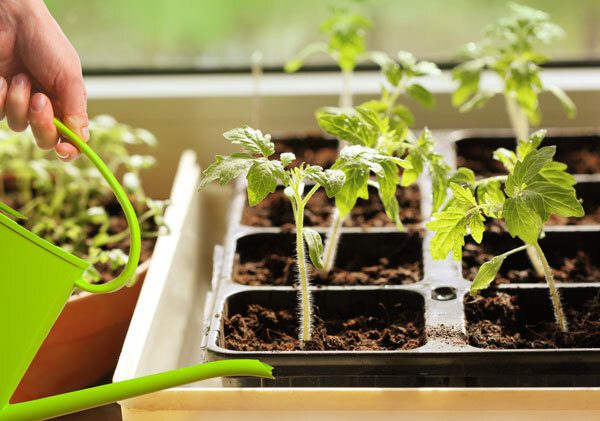
2. Overwatering or underwatering
Another all-too-common mistake to make when starting seeds at home? Not watering them enough, or worse—watering too much.
Watering can be a tricky element of seed starting to get exactly right. More isn’t better when it comes to watering seeds, and too much water can cause irreparable damage to seedlings over time.
Seeds need water to germinate, yes, but they need less than you think. Check whether or not you need to water by scratching the surface of the soil an inch or so down, and then pick up the seed tray and look at the drainage holes. If the soil is lighter in color and dry to the touch, it’s time to water. If the soil looks damp, hold off on watering.
Overwatering seeds can result in an awful fungal disease called damping off, when seedlings flop over and die, seemingly overnight.
Shallow, frequent watering prevents seedlings from developing sturdy, deep-reaching root systems that will help them survive transplanting. Plus, all that excess water is likely to wash away most of the nutrients in your soil mix!
Do this instead:
Plenty of growers swear by bottom watering, and here’s how you do it:
Nestle a seed tray with holes into a bottom tray without holes. When it’s time to water, lift up the seed tray and fill the bottom tray with fresh water. Set the seed tray back in place and set a timer for 30 minutes. After a half hour, remove the bottom tray and dump the excess water.
3. Sowing seeds too deep or too shallow
Seed depth is another ‘Goldilocks’ situation that is often overlooked—you don’t want to plant seeds too deep or they’ll never sprout, but sow them too shallow and they might get washed away the first time you water.
Do this instead:
Ideal seed depth really depends on the plant, so it’s important to do your research before sowing seeds. Seed depth is listed on the seed packet, so you know how approximately deep to plant seeds so that they will spout and thrive.
4. Sowing seeds too thickly, or not thickly enough
While more forgiving than other seed-starting mistakes, sowing seeds too thickly or too sparsely can affect germination and how quickly seedlings mature.
You can remedy seeds that were sown too thickly together by teasing them apart and potting them up separately, but some seedlings may die in the process.
Too many seeds per cell forces seedlings to compete for light, water, and nutrients, resulting in stunted growth. Less airflow could also cause overcrowded seedlings to be more susceptible to pest pressure and disease.
On the other hand, sowing seeds too sparsely just makes more work for you, since you’ll have more trays to water and more plants to find room for!
Do this instead:
Try to sow seeds at the ideal spacing for that particular plant, listed on the seed packet. Large seeds are easy enough to count out, and you can use tools like a dial seed sower or a folded piece of paper to be more precise when sowing smaller seeds.
5. Ignoring soil temperature
Most everyone understands that temperature affects seeds, but they often aren’t sure how—and it comes down to soil temps rather than air temps.
Seeds are temperature-dependent and often won’t germinate until soil temperatures fall within a certain range. This chart from the University of California identifies the ideal soil temperatures for many common garden plants:
Do this instead:
A heat mat is an excellent tool to help kickstart germination, but it must be paired with a thermostat to be effective. Reference the chart above to learn what temperature to set the thermostat to, then place seed trays directly on the heat mat and walk away.
Just make sure to take the seed tray off of the heat mat as soon as the majority of the seedlings on that flat have sprouted. Leaving seedlings on a heat mat after they have sprouted can be dangerous, as it creates conditions ideal for damping off.
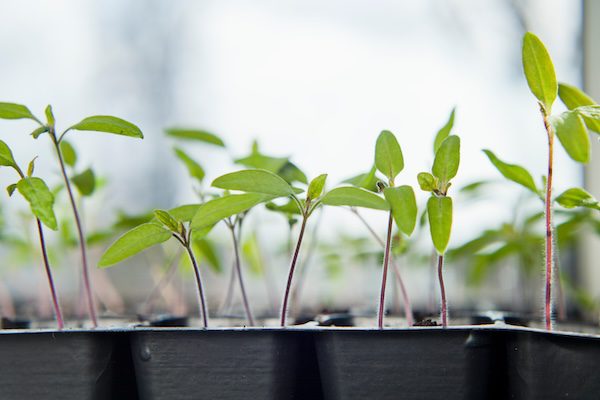
6. Relying on indirect light
Light really only becomes crucial after seeds sprout.
Some seeds—especially tiny flower seeds—benefit from being surface-sown to receive light during germination. But many more seeds will sprout in complete darkness.
Unless you start seeds in a greenhouse or cold frame where natural light is abundant, you’ll need to use grow lights. Though it’s common practice, the worst place to start seeds is in a windowsill, since seedlings will stretch towards any indirect light they can find, becoming leggy and weak.
Do this instead:
Placing a grow light too close to seedlings can burn them, but grow lights that are too far away won’t be as effective as they would at the right distance from seedlings. Look for adjustable grow light stands so that you can move the light with seedlings as they grow.
7. Reusing potting soil
What’s wrong with potting soil? Nothing, really—but it’s not the best growing medium to use for seeds; you’re better off using a seed-starting mix. Seed-starting mix is sterilized, has better drainage, is gentler on tiny root systems, and is easier to work with, especially for sowing smaller seeds.
Most potting soil mixes have larger particles and contain more fertilizer than seeds need. Don’t reuse potting soil to start seeds—use a fresh seed starting mix that has been sterilized.
The worst thing you can do is start seeds indoors using soil from your garden—while native soil is fine for direct-sown seedlings, using soil from your outdoor garden in seed starting trays is a sure way to introduce pathogens and weeds into your greenhouse.

Do this instead:
Buy bagged seed starting mix each season to start seeds, or make your own!
A simple DIY seed starting mix is easy enough to make—and as long as you start with quality ingredients you’ll end up with a good end product. Mix equal parts sphagnum peat moss (use coco coir for a more sustainable option), perlite, and vermiculite—that’s all!
8. Using dirty equipment
Just as reusing potting soil for seed starting can introduce pathogens to your plants, reusing dirty equipment is also problematic.
Do this instead:
Sterilize seed starting equipment (including seed trays, heat mats, and humidity domes) by washing with a diluted bleach solution, rinsing with water, and then spritzing with a hydrogen peroxide solution and rinsing again.
9. Using old or damaged seeds
Older seeds are generally viable—seeds can last for three to five years depending on the species—but only if the seeds have been stored properly in a cool, dark, dry place. Seeds that have been exposed to moisture, heat, or light tend to have lower germination rates, and may not sprout at all.
Do this instead:
Look for the phrase ‘packed for 2024’ when purchasing seed packets. Eden Brothers’ non-GMO seeds are always packed for the current season, so you can stress less knowing that we have the highest germination rates on the market!
10. Not stratifying or scarifying seeds when needed
While less common, some seeds need stratification, or exposure to freezing temperatures, to germinate. Still, other seeds require scarification, or physically weakening the outer seed coat to allow the seed to sprout.
Do this instead:
Research whether or not your seeds need stratification, scarification, or any other treatment to sprout. For seeds that require stratification, can either direct sow them in the ground in autumn so that they will undergo winter, or you can put the seeds in the freezer for three months to simulate winter conditions.
For scarification, either use sandpaper to rough up the seed coat, or soak the seeds in water to soften them.
This is a long list—but try not to worry too much. Seeds are made to sprout and that’s what they’re going to do! As long as you start with high-quality seeds and do what you can to provide ideal conditions for germination, you’re going to be successful!
Happy growing!